MYOB Sync for WooCommerce: Detailed Setup Guide
WooCommerce · Practical documentation · Reviewed 12 November 2026
Connect your WooCommerce store to MYOB, review imported data and run the sales, stock and product flows you choose.
Before you start
- An HTTPS WooCommerce store and a WordPress user able to approve API access.
- A MySync account and an authorised MYOB login.
- Matching product/variation SKUs and MYOB item numbers.
- The correct company currency, sales tax codes and payment account.
Open the WooCommerce app in MySync, sign in or create an account, then approve the connection from your own WordPress store.
The setup sequence
- Open MySync and create a store setup
- Approve WooCommerce and MYOB
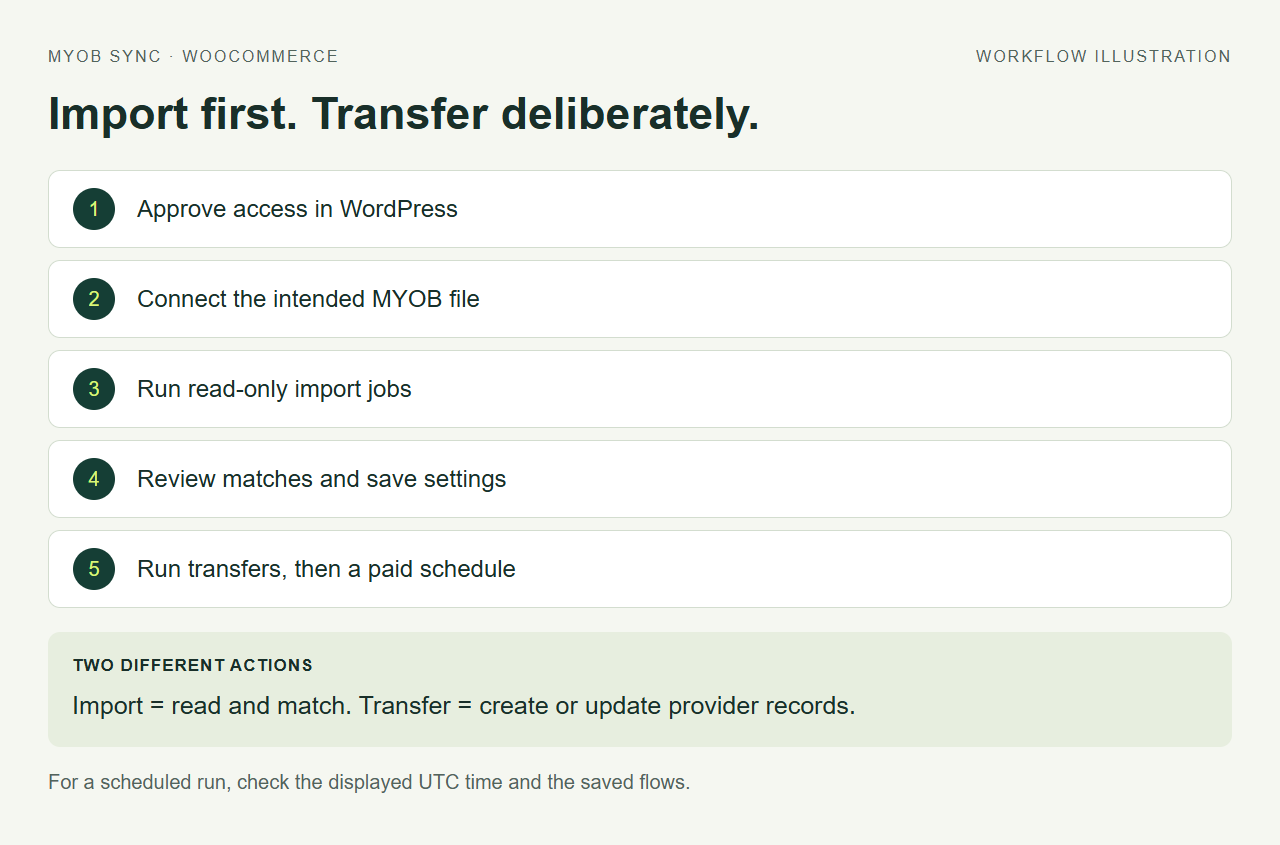
- Import data before enabling transfers
- Save tax, sales and payment settings
- Run a transfer and review exceptions
- Configure stock, products and prices separately
- Set a schedule and check billing
Step 1 of 7
Open MySync and create a store setup
Open MYOB Sync for WooCommerce. Sign in with your MySync account or create one, then name the store setup. If you manage several stores, keep a separate named setup for each connection.
Step 2 of 7
Approve WooCommerce and MYOB
In Connections, enter the store’s HTTPS URL and select Connect WooCommerce. Sign in on your WordPress store and approve access. Entering a URL alone does not connect it. Return to MySync and check that the store is authorised.
Then choose Connect MYOB, approve access and confirm the company file presented by the connection flow. Check the approved company name before continuing. Reconnecting to a different file can reset transfer preferences.
Step 3 of 7
Import data before enabling transfers
Open Sync jobs. Run the product and customer imports, then import orders or payments. Read-only imports capture data and match existing MYOB records; they do not create provider records. WooCommerce variations need their own unique SKU. Guest customers are captured from orders even when they are not registered WooCommerce customer accounts.
Step 4 of 7
Save tax, sales and payment settings
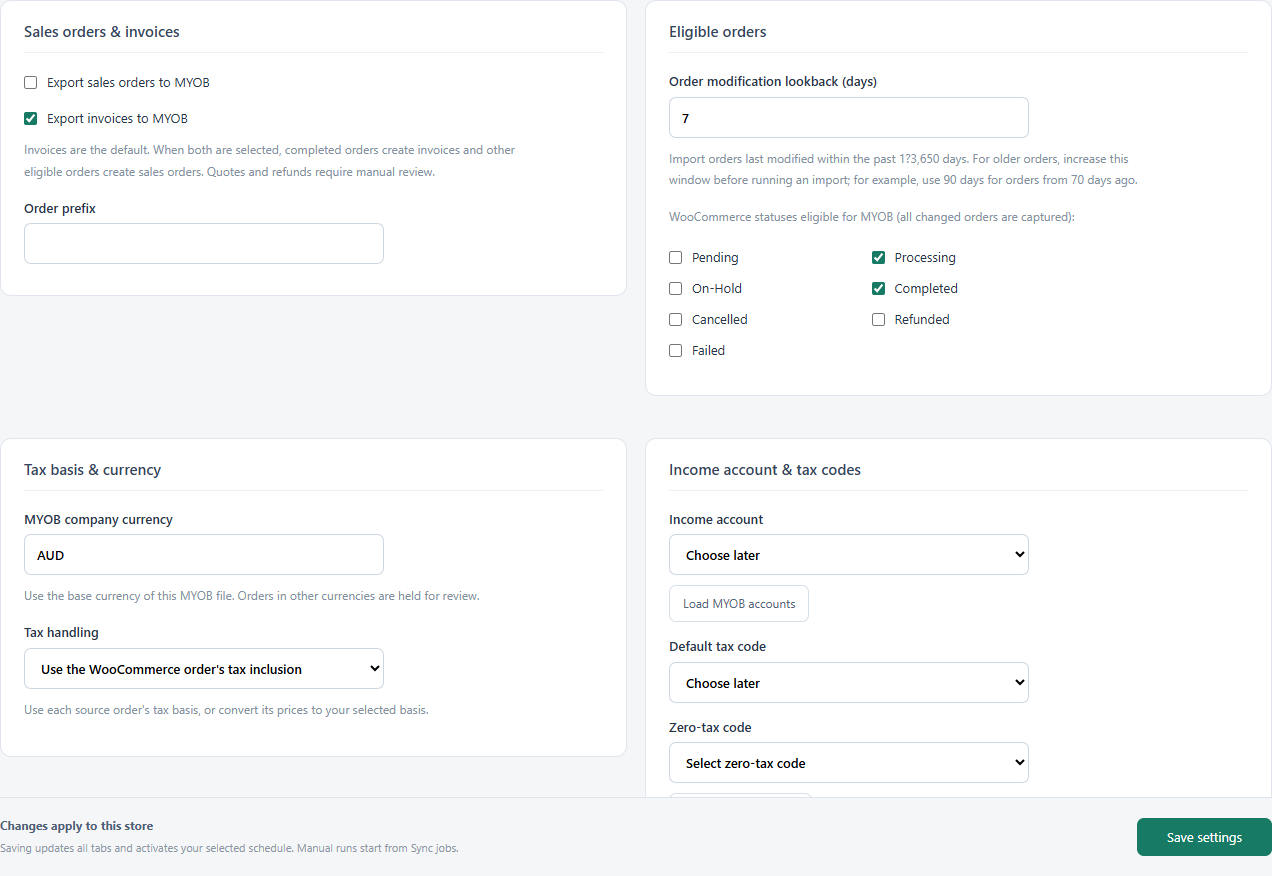
In Settings, confirm the MYOB company currency and select taxable and zero-tax sales codes. Choose orders, invoices or both, the eligible order statuses and the modification lookback. When both document types are enabled, completed eligible orders use invoices and other eligible orders use sales orders.
Choose individual customer cards or a saved default customer. Enable payments separately and select a MYOB payment account. Payments wait for an invoice unless you explicitly allow payments to orders. Save your settings; saving alone does not start a manual transfer.
Step 5 of 7
Run a transfer and review exceptions
Run transfers to MYOB from Sync jobs after checking the import. Review Orders and Payments and compare the result with MYOB. Missing item matches, foreign-currency adjustments, fees and unconfirmed payments need review. Refund data is captured, but the WooCommerce flow does not use BigCommerce’s automatic credit/refund checkbox.
Step 6 of 7
Configure stock, products and prices separately
Use Inventory to choose the stock update flow. Product creation and price updates have separate controls and plan requirements. For prices, choose the direction, source field and destination field; review the zero-price option. Start with one known SKU when testing catalogue updates.
Step 7 of 7
Set a schedule and check billing
Paid schedules run the saved flows. Choose Manual, Hourly or Daily as offered in Settings → Schedule, checking the displayed UTC time. Review Sync jobs and Activity after the first scheduled run.
Review your plan and billing in Account & help. Disconnecting a store, or removing an optional WordPress connector, is separate from cancelling a Stripe subscription. Use the available billing controls or contact support if you cannot open them.
Import, transfer and schedule: three different actions
| Action | Expected effect | Where to check |
|---|---|---|
| Read-only import | Captures source records and prepares matches without creating provider records. | Imported Orders, Customers, Payments and Products. |
| Transfer | Uses the saved eligible flows to create or update supported records. | The record status, the run result and the resulting MYOB/store record. |
| Paid schedule | Runs saved flows at the selected interval. | The displayed UTC time, subsequent run history and Activity. |
Settings checklist for the first sales export
- Confirm the MYOB company currency. Keep a foreign-currency example out of the initial acceptance test.
- Select the taxable and zero-tax sales codes that match the accounting treatment.
- Choose a sales document type and an eligible source order status.
- Resolve each missing or duplicate item match.
- Confirm whether the sale uses an individual customer or a default card.
- If payments are enabled, choose the account and check the matching sales document.
Understanding a review result
A record captured by an import has not necessarily been exported. A missing item or customer match needs attention before the associated sale can be posted. An invoice-only payment waits for an invoice. Fee adjustments, foreign currency and unconfirmed transactions may require review. WooCommerce refund capture does not enable the BigCommerce automatic-credit flow.
Before leaving the first run
- Confirm the store and MYOB company file before transferring data.
- Check one product match and one eligible sales document in both systems.
- Compare customer, currency, tax, freight and total before enabling more flows.
- Review payment and refund results separately from the sales document.
- Enable only the schedule and data flows you intend to run.
For a failed or uncertain result, use the MYOB Sync troubleshooting guide. Send support the platform, store, affected reference, run time and error text. Keep passwords, tokens and payment-card data out of the request.