MYOB Sync for Mailchimp: Setup and Troubleshooting
By the MySync team · Updated 17 November 2026
Follow this guide to configure and check your Mailchimp connection. Review the current app and provider permissions for the flows you choose.
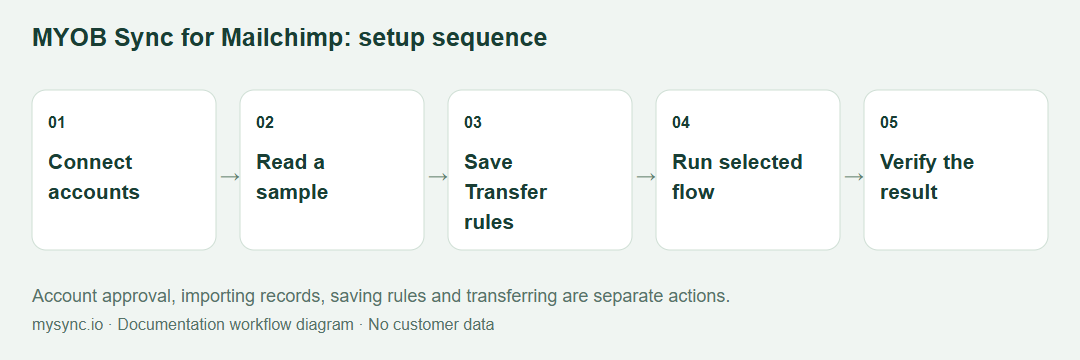
Prepare the account and sample
This guide covers the practical MySync workflow for Mailchimp. The Mailchimp product page describes features and business use cases separately.
- A Mailchimp account with an existing audience and access to its Marketing API.
- An online MYOB company file with the customer and item data to export.
- The intended audience, catalogue currency and a consent policy for customer data.
Choose a small source sample with an expected destination result. Use an authorised company file and keep automatic flows off while checking the first run. Your MySync subscription and your provider’s own subscription are separate.
Sign in and connect the accounts
- Open MYOB Sync. Register if needed, verify the account and choose Mailchimp. Existing users return to their saved app.
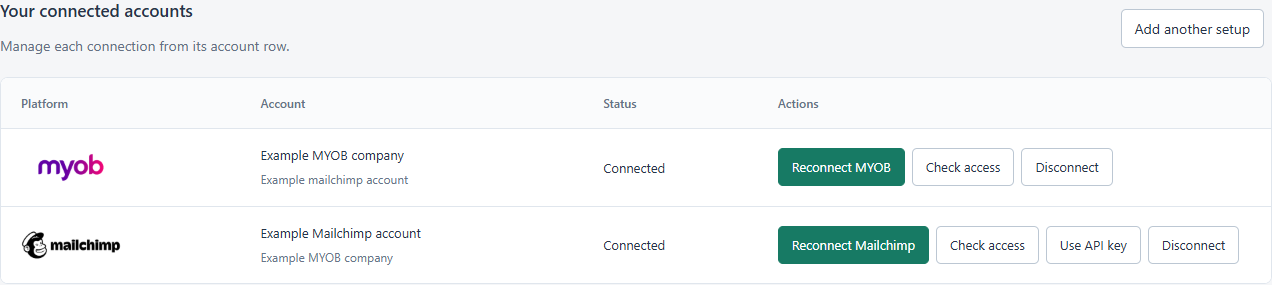
- Open Connections. Read the platform account name and the MYOB company-file name before continuing.
- Use Connect Mailchimp in the account row to sign in and approve access, then connect MYOB and approve the company file. An account-owned Mailchimp Marketing API key is available as an alternative to sign-in.
- Use the action in the relevant account row. OAuth approvals open on the provider’s own site. Where a credential form is needed, enter it only inside the app.
- After approval, return to Connections and confirm the displayed account and status. Reconnect when access needs renewing; do not copy an expired authorisation URL.
Connecting grants access but does not enable every transfer. Start with a read-only import and deliberately save the flows you want.
Alternative: a Mailchimp Marketing API key
- Sign in to the account that owns the audience.
- Open your profile menu, choose Account & billing, then Extras → API keys.
- Create a key named MySync MYOB Sync. Copy the full value including its -usNN data-centre suffix.
- In the Mailchimp account row choose Use API key, paste the value and save. Use Check saved credentials if verification needs retrying.
Use a Marketing API key, not a Mailchimp Transactional/Mandrill key. Keep the key out of screenshots and support messages. OAuth sign-in remains the normal connection option.
Choose audience and currency
Load the available Mailchimp audiences in Transfer rules and select the correct destination. Set the catalogue currency before first export; the app does not convert prices between currencies.
Preview customers and products
Read a small sample from MYOB. Check customer email validity and the item SKU, name, price and inventory. Inspect skipped-record notes rather than trying to force invalid records through.
Configure real product links
If required, enter HTTPS product URL and image URL templates using {sku} or {uid}. Open a resulting URL to verify it exists. Leave templates blank when you do not have real destinations.
Export the chosen flows
Enable Customers and/or Products, save and run an export. Review the audience and the dedicated e-commerce store. Repeat an unchanged export, then test a small source change.
Review conflicts with other integrations
Do not point this setup at another connector’s catalogue. Audience contacts match by email, but this integration owns its own product store. Review changed emails and destination edits before allowing replacements.
Check the key fields
Use this reference alongside Transfer rules. Controls vary by platform and entitlement; review the labels shown in your app rather than assuming another platform’s mappings apply.
| Field or decision | What to check |
|---|---|
| MYOB company | Source customer cards; Mailchimp can also read selected item data. |
| Destination account | The Klaviyo or Mailchimp account approved in Connections. |
| List or audience | The existing Mailchimp audience and dedicated catalogue currency. |
| Enabled flows | Customers and Products are selected separately. |
| Schedule | Manual first; select hourly or daily only after an enabled flow and entitlement are confirmed. |
| Record outcome | Inspect exported, unchanged, skipped and rejected records rather than assuming every imported row was written. |
Run, inspect and repeat a small transfer
- Read the source records with the app’s import or preview action. Check the import count and a known source reference.
- Open Transfer rules, enable only the flows required by the sample and save. Review required fields and any highlighted sections.
- Start the relevant manual sync or transfer using the app’s job controls. Imports, previews, saved settings and completed transfers are different actions.
- Open the destination profile or catalogue record and compare the mapped fields. Check marketing subscription status separately from profile existence or list membership.
- Run the same unchanged sample again. Existing completed work should be recognised. Investigate any uncertain result before repeating a financial write.
- When satisfied, select the required schedule and enabled flows. Review the time zone shown in the app and inspect the first scheduled result.
Track exported, unchanged, skipped, rejected and review outcomes separately. A successful run can still contain excluded or unsupported source records.
Resolve a failed or incomplete result
A customer or product is held for review
Read the record note. Check email changes, audience subscription state, destination edits and the SKU, price or URL. Do not overwrite another integration’s catalogue to clear an exception.
MYOB approval fails
Restart Connect MYOB from the app and approve the intended file. If MYOB reports a redirect-URI mismatch, send support the error text: that is an app-registration configuration problem, not a reason to share your MYOB password.
An automatic run never starts
Confirm the flow is enabled, required fields are saved, a real schedule is selected and the current plan includes it. A toggle without a timing selection cannot define when a job should run.
A transfer timed out or may already exist
Read the record note and inspect the destination first. Keep the original reference and run time. Do not create a manual duplicate while an outcome is uncertain. Use the app’s supported retry or review action once the actual result is known.
Manage billing and connection access
One AUD 9 monthly plan includes customer and product exports, manual runs and schedules, with a 14-day trial.
Use Account & help or the app’s account screen to inspect current entitlements and billing controls. Disconnecting a provider is separate from cancelling a subscription. Use the available billing controls to manage renewal; ask support if you cannot access them.
Disconnect removes the credentials held for that link. Revoke the provider’s app grant or API key when you also want to remove access at the source. Review mappings and sample results again after replacing a company file or destination account.
Gather useful support evidence
Send support@mysync.io the app name, affected store or account, source record reference, run time and time zone, action attempted and exact error message. Include a provider request ID when shown. Keep passwords, client secrets, access tokens and payment-card data out of the message.
Related references: MYOB Sync troubleshooting, MYOB errors and logs and activity.
Choose another MYOB Sync guide
- Neto setup
- Shopify setup
- WooCommerce setup
- BigCommerce setup
- Squarespace setup
- Klaviyo setup
- Stripe setup
- PayPal setup
- eBay setup
- Amazon setup
- Square setup
Mailchimp integration features · Workflow planning guide · All help guides